Thursday, January 30, 2014

Hello, my name is Nici and I'm a liar

Remember how I said I would update this more frequently? And you guys would actually hear from me more then quarterly? And remember how posting tutorials might be my thing, so I have to write to you guys? Remember all that?

Yeah....sorry.

I partly blame the fact that there is nothing exciting going on in my life. At least nothing that I feel I should write about excessively. For the most part it's school, work, school, work, home renovations, school, more work, knit (hahahahahahahhaha!!!) and school.

I actually haven't even gotten all that much knitting or spinning done in the last couple of months. Why? because it's nearly IMPOSSIBLE to do so with my current boyfriend. I could get more knitting done with a toddler, or a bag full of wet kittens. If we aren't doing something around the house, then he wants snuggles and cuddles and lovin's. Which I'm totally okay with, but sometimes I just want to knit! I miss my stash.

So I've started going to a knitting group that isn't too far way from my house. It meets up once a week, and sometimes I make it and other times I don't. The last two nights we had date night at the same time that knit group happened, and I'd rather romp around Tacoma having fun and making memories. But if we have nothing planned, I'm planning on being there.
It will probably also be the only place where I'll get any knitting done. Go figure.

I started this tunic a month ago, and I've been knitting the same 8mm ever since then. What I mean is that I keep messing up and having to start over. Let me outline it for you:
  1. Swatch to make sure gauge is right, then eagerly grab new ball of yarn to get going.
  2. Cast on not enough stitches and run out of tail.
  3. Cast on stitches again, have too much tail, but don't care and tuck tail away instead.
  4. Knit 8 mm and find out that your gauge is off. Instead of 20sts/4" we're getting 21sts/4"...not a huge difference, until you take into account the 37 3/4" you're working with.
  5. Rip everything out, swatch with a smaller needle size.
  6. Discover you're now knitting at 19sts/4", say screw it and cast on anways.
  7. Knit the small size 'cause the medium size was too big. You want a tunic, not a tent.
  8. Knit the first 8 rows, try to untwist the knitting, discover in horror you twisted the stitches somewhere along the way, and nothing is going to untwist them.
  9. Rip out everything in a angry, mumbling fury of string.
  10. Pick up the 216 stitches you need. AGAIN! and begin knitting AGAIN! in what you're hoping is going to be a correct manner.
  11. Check the twist of the stitches every 2 inches until you're satisfied that you're knitting is not twisted somewhere along the way, and maybe this time you'll make actual progress.
  12. Put knitting down and don't look at it for a week.
And that is where we are now. I got a row in yesterday while BF was watching a show on Netflix he's been wanting to check out for months. Sitting on the couch with gray yarn in my lap was a nice change. Maybe I should find more intriguing TV shows on Netflix for him to "find".

Speaking of getting knitting done, I have one more hour before BF get's home, and I'm mostly finished with my homework...so if you'll excuse me...*dashes to her stash*

Tuesday, November 12, 2013

Tutorial and...update?

Seriously, I swear. I just haven't had much desire to do a whole lot of blogging lately, to be honest with you lovely people. And honestly, not a whole lot has gone on around here that would require a update.

I've mostly been concentrating on school work these past couple of months (read, I've been thinking about concentrating on school work but instead sit on you tube for hours before realizing I have something due in three hours and work like a maniac to finish it) And spinning has taken a huge back seat lately. Buggy has even been in the closet for the last few months, just sitting there with some pretty roving on the bobbins.

Although I did learn how to make wine bottle lamp shades, so that's pretty awesome. Since I have nothing else to talk about today, I suppose I'll give you all a quick tutorial on how to make one yourself. Maybe that will be a thing for me...a monthly tutorial....ooohhh, there's a thought. Anywho.

To start you'll need the following items:
- An empty bottle (I used beer as a tester 'cause it was easier to screw up)
- A glass cutter + cutting oil (find them on the internet, the cheapest shouldn't cost you more then $10)
- Gas
- String
- A lighter (one of those long ones...seriously)
- A bucket full of water (You'll thank me later)
- Safety glasses ('cause you know, when setting things on fire, safety is our number one priority)
- Marker
- Measuring Tape

That's right, I said gas. You can find the same tutorial using nail polish remover, which I tried, and it didn't work. Maybe it was the type of remover I was using, But I found that the remover mostly bunt too quickly and not hot enough. So that sucked. Feel free to try the nail polish remover and if it doesn't work for you upgrade to gas.

Step 1: Tie the string snuggly around the bottom of the bottle you're going to cut. You want the string on the bottle tightly, but not so tight that you can't slide it off again. Cut the string and slide it off  the bottle.

Step 2: Using a marker and the measuring tape, mark a line around the bottle from the bottom up. This way you'll know exactly where to put the string again before you set it on fire.

Step 3: Soak the string in some gas or nail polish remover. I recommend using gloves when your doing this. Mostly so your fingers don't smell like gas. On seconds though, you might want to wear gloves the whole time you're doing this. Just so, you know, you don't hurt yourself. Then slide the string back onto the bottle over the marker line you created in Step 2.

Step 4
Step 3 alternative: Alternatively, and this is what I ended up doing, slide the string back onto the bottle over the marker line you created in step 2. Take a spray bottle filled with Gas (like the one I used) and lightly spray the string. Once it's saturated, wipe up any gas that is on the bottle with a throw away rag.

Step 4: Put your safety glasses on. Grab the bottle by the neck and hold it over the prefilled water bucket. Taking your lighter (the long one) and set the string on fire.

Step 5: While your bottle is on fire (okay, that sounds really bad) rotate the bottle slowly. You basically what the fire to go around the string. Rotate the bottle until the fire goes out by itself.

Step 7
Step 6: Place the bottom of the bottle into the bucket of water. You'll probably hear crackling as the glass splits. That's fine. Lightly tap the bottom of the bottle, and it should pop right off.

Step 7: Clean the bottle, and use a file to smooth away any sharp edges that you may have. Because I have a glass grinder at home, I just used that to smooth out the edges, so I can't really recommend a good inexpensive alternative.

Step 8: Now the fun and not so dangerous part begins. once you have the bottom taken off your bottle you can use glass paints to decorate your bottle any way you want. I used Gallery Glass paints to draw on mine. They come in little 2oz bottles and can be bought at any Michaels craft store. The best part about these paints is that you can make little window clings with them and add decorations to just about flat surface.

Mind you, after making the lamp and decorating it, I don't know how to turn it into an actual lamp.
Finished Bottle Lamp
I'm assuming you can purchase the set up for the light bulbs at any home depot, or Lowes but I haven't gotten that far yet. So, ya know, you're on your own with that last part.

So I know it says up in that title that there will be an update, but seriously I can't think of anything. I've been on a couple of tiny trips, but other then school work and regular work, I haven't done anything else. \

Hopefully you guys will get a more exiting update eventually. Maybe.

Sunday, July 21, 2013

Finally cott-on

Alright, so as plays-on-words go, this one might not be the best. But I tried, okay?

It's time for the Tour de Fleece again, and this time I'm sorta participating. In a nutshell, the Tour de Fleece is a challenge given to spinners all over the place to spin some yarn every day that the Tour de France happens. They spin bicycle wheels, we spin spinning wheels.
You can join a "team" or start your own with friends. In the "teams" you can chat with others people and show off your progress photos. And of course get motivated to actually spin the whole month that the Tour de France goes on.

I'm part of the Rookie team, not that I've talked much to people or even posted a single picture, and a Ravelry friend of mine started an impromptu Slacker team that I've joined with her. So far I'm less of a Slacker then I thought I would be. I spun  a whole 10 minutes on the 29th (the start of the Tour) a whole 10 minutes on the 30th, and a whopping 30 minutes on the 1st. I.Was.On.FIRE! After that my spinning was interrupted by camping vacations, by school obligations, and by general laziness.

The personal challenges I set for myself were 1) spin cotton, 2) try core-spinning. I started working on the cotton first and after failing miserably at my wheel, I tried it on one of the spindles (after running to the Slacker group and asking for advice and getting a link to some instructions of course). And I'm happy to say that it actually works. 

I also spun up two core-spun yarns, and they turned out pretty nicely. One of my Ravelry friends was amazing enough to send me some over-twisted core yarn and a small batt to play with. I loved the colors of the bat and was kind of disappointed when the core-spun yarn didn't turn out quite that pretty. But after I realized that I could pull the batt apart into two color sections I liked the colors quite a bit more.

The second core-spun yarn is the Norwegian wool that Mom dyed for me, flecked with some blue felting wool. They are little packets of wool that Michaels sells for felting projects, but they worked great as accept colors. I even threw some beads onto the core thread and incorporated them into the yarn.

I even finished a spinning WIP and am plying it right now. I'd like to think that I was rather productive during this tour. I've learned some new techniques, I've seen some amazing yarns, and I've met some new friends. And hopefully next year's Tour will be just as productive for me.

Thursday, April 25, 2013

What the Early Learning Center has taught me...

During spring quarter I'm working at the Early Learning Center on the TCC campus as part of work study. It's basically a day care center while parents go to classes. Here is what I've learned so far:

1) Children apparently run on ranch dressing.
2) 2-3 year old's have an amazing imagination
3) 2-3 year old's suck at following directions when there is more then one child within a one mile radius
4) Ranch is a bitch to get off plates
5) Children can put away more cheese then a dairy can make.
6) My hair is free-game for "beauty" treatments.
7) Anything solid can be used as a brush...anything. (can you say blue crayon scalp?)

 I work in the toddler room, which is usually my favorite age group. At 2, kids are imaginative enough that they can entertain themselves, smart enough to understand when you tell them something, but still small enough to need cuddles and stories.
But they're such a handful at times - like when they get that crazy hair up their arse - that it makes me question if I ever want to have to deal with that for the rest of my life. Yeah, I know they won't be 2 for the rest of eternity, but the older they get the more obnoxious children get. I mean dear god...some of the kids at the ELC..dudes...why? Makes me want to smack the parents to be honest.

On a non-childcare related note, I've also learned that:

1) Having a minimum of 2 hours of kill between school and work let's me get homework done.
2) I should always bring a novel to read.
3) My paralegal teacher is ridiculous
4) There is no point running for the bus...I won't make it.
5) Wearing comfortable shoes is important
6) Don't eat lunch
7) There are always leftovers in the kitchen
8) My paralegal teacher is ridiculous

Oh, and I haven't gotten a lick of spinning in since the quarter started. Fuuuuuuu----

Monday, March 4, 2013

And now I'm sore


View of the mountain
from the car
I went hiking with a friend this past Sunday. He's always wanted to go, I had nothing else planned, so we packed some snacks, drove to the location and then hiked 1.9 miles to the top of this mountain. It was amazing.

The trail we were on is well known and there were a ton of people going up the mountain as well as coming down from it. The trail goes back and forth so there are some steep points, and some that are nicely leveled. Throw some large rocks in and you have a trail that will give you a workout without killing you.
The ledge we
stood on

Naturally my sneakers were not equipped to handle the snow and slush that was on the trail, and I think I may have stepped in a puddle at least once...maybe. My toes became ice cubes after a while so I'm not sure. But it was so worth the view from the top of that ledge. So.Worth.It.

It's made me appreciate Washington even more. I've always known it was pretty, but I've never had the chance to see just how pretty it can be.

Now both of us are sore. But again, it's so totally worth having seeing that view for myself. And I'd totally do it again in a heartbeat. We've made tentative plans to go again, but thanks to Washington weather, a lot of it depends on whether it will be raining on the weekend or not.Time to invest in some good hiking boots me thinks. =)

Saturday, February 16, 2013

Madrona! (and blog pimping)

Madrona comes once every year to the Tacoma area, and Mom and I have made a point to go every year. It's only 20 minutes away via bus, so now that we know about it, it would be ridiculous not to go.

We usually just go for the market place, where all kinds of venders offer their yarns and rovings. I love it because most of the time there will be one or two people that own the animals so not only is the fiber less expensive, but you get to talk to interesting people. And if you ever have a question, vendors are always more then happy to chatter your ear off with the answer. We get passionate about our work. =)

My "haul" from this year is in the corner over there. It's not much (surprisingly) but it's all fibers I haven't worked with before. The Romney is one lovely pound of raw fleece, so I'll get to experience the joy of washing it myself. Mostly to get some of the dirt out, and the lanolin. That should be fun.

The other three are 4 oz each. I've never worked with either cotton, Jacob, or Finnish wool. So that will be awesome. With all these new fibers that I'm trying out, I'm thinking that maybe I should start keeping a journal of some sort. Just so I can keep a small sample on hand to remind me of what the fibers felt like; and why I love/hate it.

On different news, the construction directions for my flip-top mittens were used by a very lovely designer in her own mittens. They are Dr. Who inspired Tardis mittens and are just too cute. I'm really tempted to make myself a pair...even though I don't wear mittens. So, you guys should check her out.

Now I think I'm going to go and finish the first sleeve of this darn baby sweater. It's part 2 of the beginning sweater class tomorrow (I'm teaching) so I might want o have something presentable before class begins. Ugh..baby sweaters.

Tuesday, February 5, 2013

Dyeing to spin

Nuked Masham
Nuked Merino
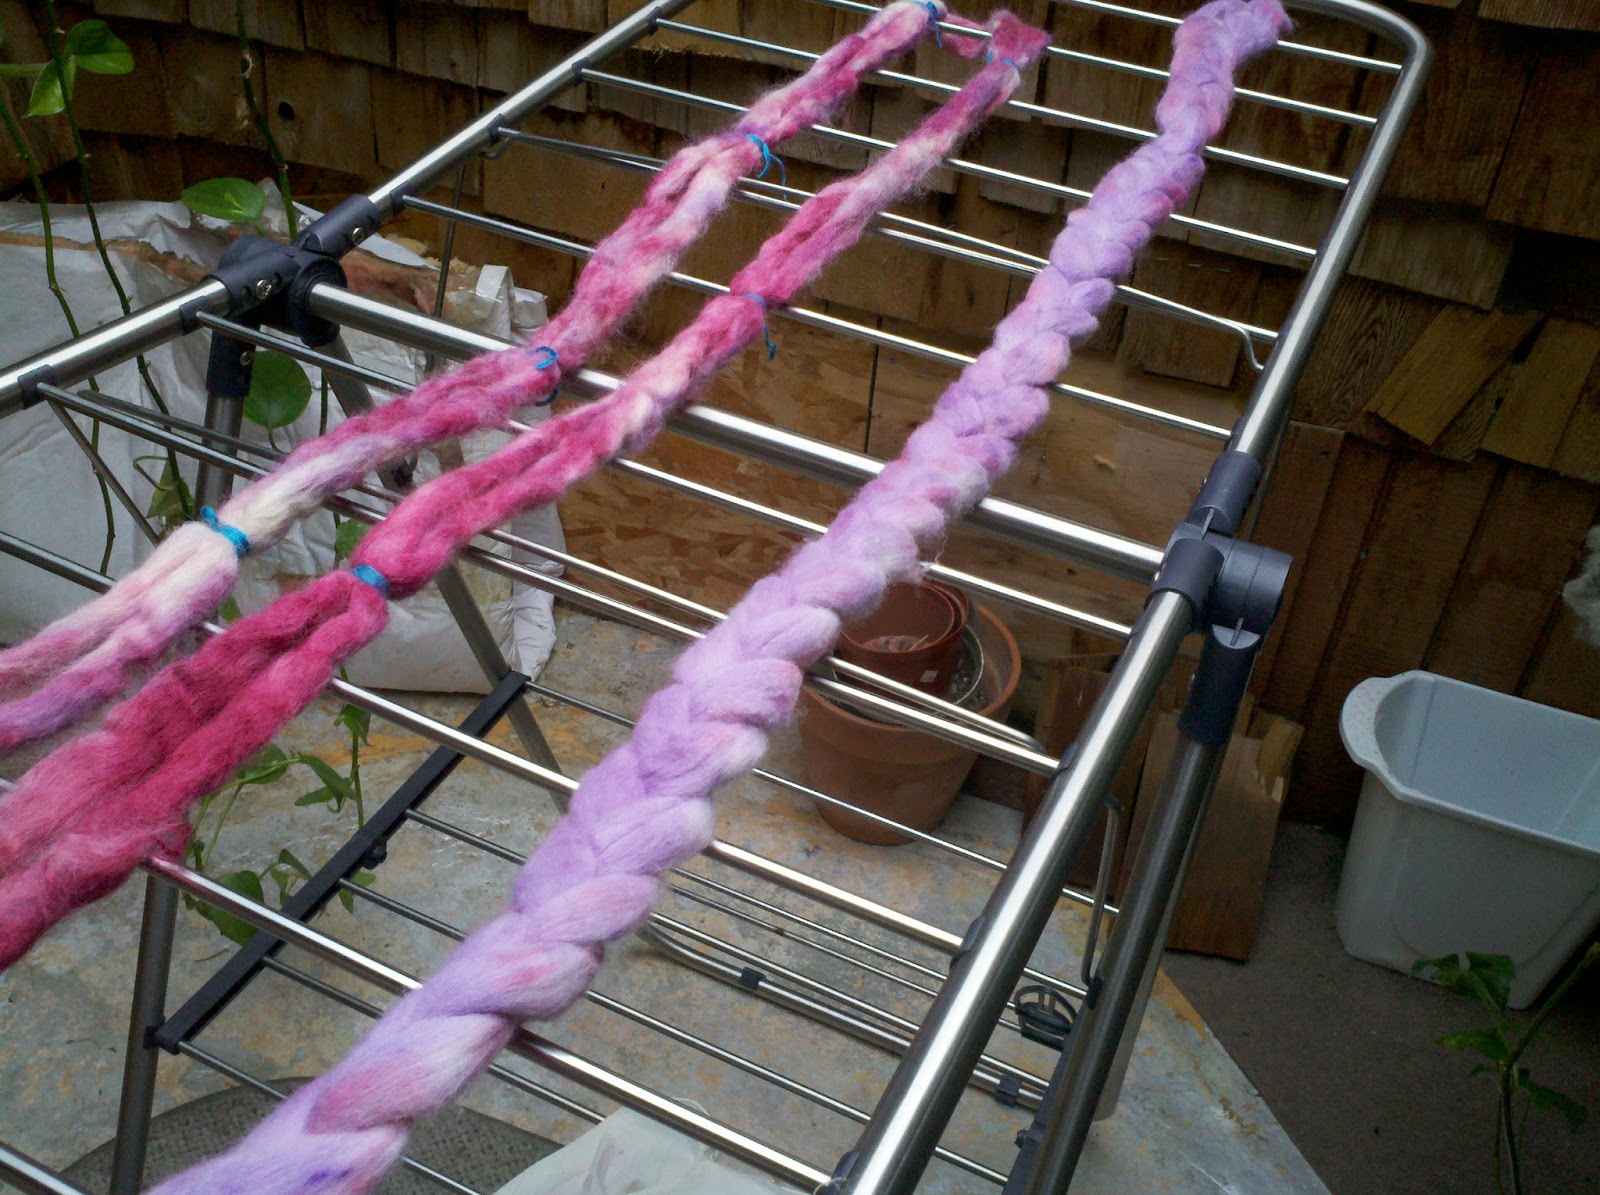
I decided to dye some roving today. So as soon as I got home I pulled my stash bin out from the closet and pulled my Masham and Merino wools out.

Fear of ruined counter tops or floor had banished me to the car port during the summer, but with family members still asleep I crafted myself a little  work station in the laundry room. I put my jersey-rug down on the floor first, followed by a large double layered piece of cardboard, and then the cling-wrap...which clung to itself marvelously.

I let the masham wool soak in a bath of vinegar and water first. The roving had been tied off every few inches because I was hoping it would give it a tiny bit of a tie-dye look. I'm sure I've failed miserably with that. Oh well. I turned the single string of merino roving into a braid and while I dyed the masham I let the merino soak.

Colored Masham
For the masham I dabbed the wine color on with a sponge brush. At first I thought about putting it down in particular spots, but then just dabbed quick lines down the roving. If the color went away I bunked the bush back into the cup, and then continued down the line. Mom still had some purple in the little squeeze bottle she had provided, so I simply added more. The purple I gently sprinkled all over the roving, not caring where it landed.

Double-sided Merino
While the masham was being nuked in the microwave (pot? cooking? PAH!) I worked on the merino. This time I started with purple, and liberally squeezed it all over the braid. The color didn't bleed through to the other side though. So with purple all gone (what was in the bottle at least) I changed to the wine color. I added it into the bottle, turned the half dyed braid over, and squeezed the red onto the still white side. So now there is a purple side of roving, and a red  (well pink is more accurate really) side of roving. I have no idea what the inside of the braid looks like though...

Both rovings are drying right now. And I can't wait to spin them up. I've never used masham wool before, so it should be interesting. And of course, I'm very excited to see what the colors will look.
Merino unraveled

There is still a 4 oz braid of merino sitting in my stash bin. I wonder what wonderful colors it will adopt.

Edit: I unwound the merino braid earlier this morning (02/06/2013) to let the roving dry faster. And I just had to share with you all how amazing the merino turned out; in my opinion at least.The purple and pink are made wonderful little speckles all over the white roving. I can't wait to spin this up and see what happens with it. The Masham is quite lovely too.

Masham and Merino drying